Worm Farming Guide
In a worm farm, tiger worms or red worms are used to eat through a mixture of food scraps, garden waste, waste paper and cardboard to produce worm castings (composted material) and liquid fertiliser, known as worm tea. Both the castings and the worm tea are excellent fertilisers and great for the garden. Worm farming could be good for you if:
- you want to compost your food scraps at home, and keep the goodness local
- you would like to complement a system you already have – be it the kerbside food scraps collection or Bokashi
- you don’t have the outdoor space to compost
Click here for more info on the Benefits of Worm Fertiliser
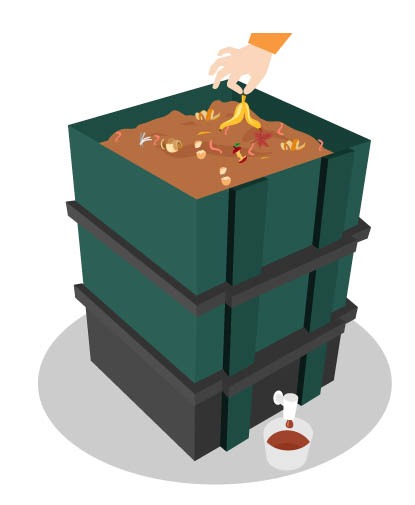
Getting Started
Choose a cool shady site sheltered from the sun to set up your worm farm – carports or covered porches are great. Prepare the worm farm with a layer of damp, well drained bedding, such as coconut fibre, shredded cardboard, or paper.
- Use a layer of bedding first – e.g. hay, coconut fibre, shredded cardboard or paper
- Bedding should be damp and porous
- Add worms – 1000 (250g) is fine; 2000 is even better
- Worms can eat their own weight each day so don’t over feed them (e.g. 250g of worms give them about 200g of food)..
- Worms need air but not light (photophobic) so cover food scraps with a damp carpet, newspaper or cardboard to provide a moist dark environment.
What to Feed Your Worms
Greens Are
Organic waste that is full of nitrogen. It is usually soft, fresh and moist. Because of the nitrogen “Greens” rot and putrefy very quickly causing bad smells. Good examples of “Greens” are
- Food waste
- Fresh green lawn clippings
Browns Are
Organic waste that is mainly carbon. It is dry, brown and brittle. Because Browns are relatively free of nitrogen and moisture, they can take a very long time to breakdown. Good examples of “Browns” are
-
- Fallen autumn leaves,
- Paper and card board
- Dry “browned-off” lawn clippings
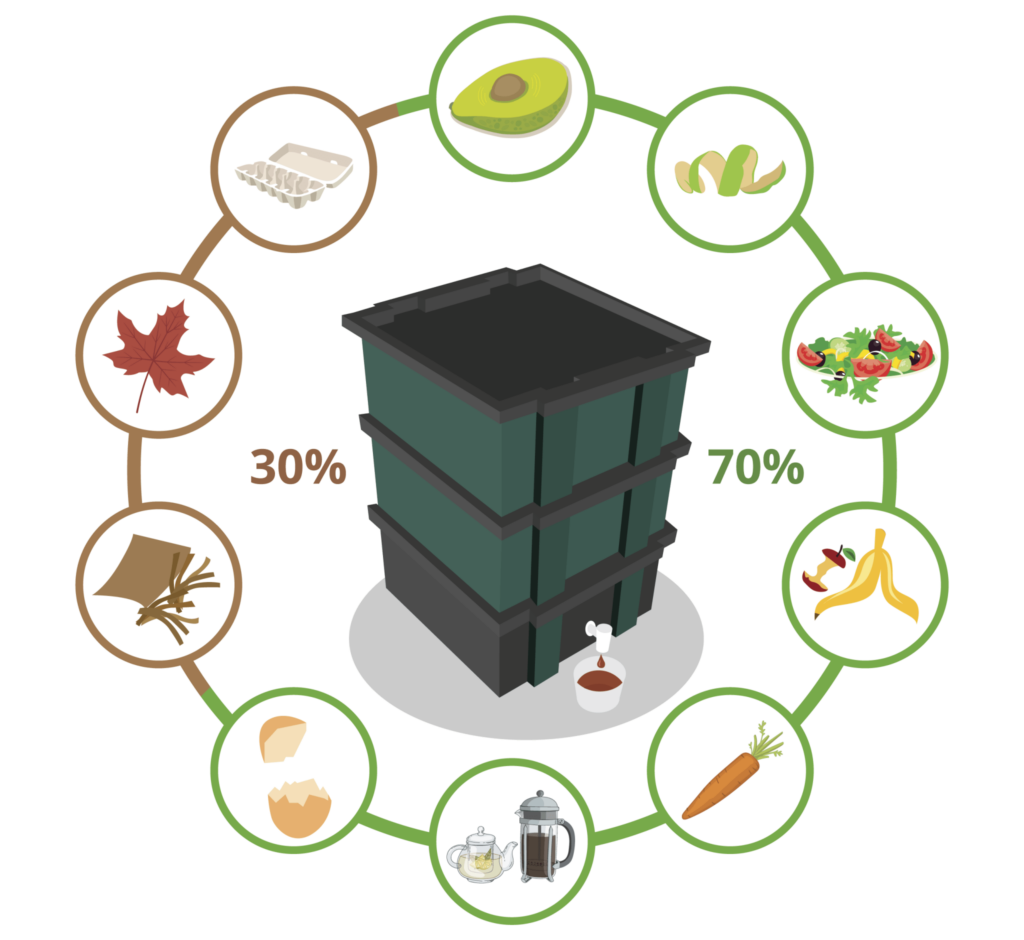
Do add
Greens 70%
- Most fruit and vege scraps
- Coffee grounds and tea bags
- Eggshells
- Vacuum dust (natural carpet only)
- Manure from animals like rabbits, & Guinea pigs
Browns 30%
- Torn up, wet cardboard or paper
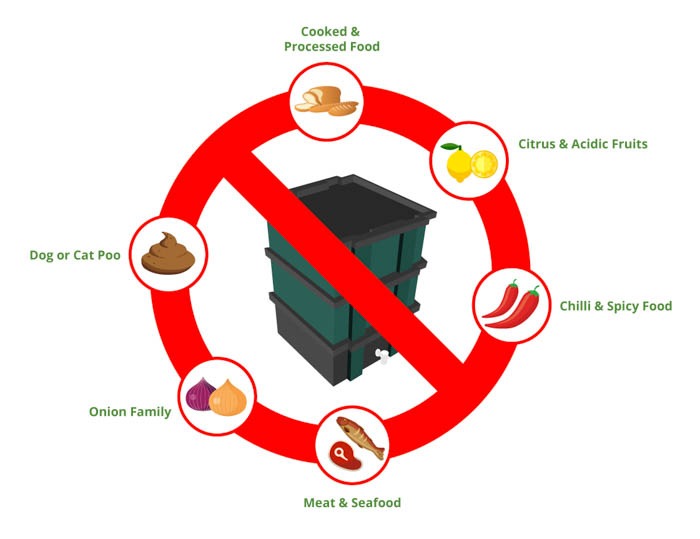
Don’t add
- Spicy food
- Chilli, onion and garlic
- Meat and milk products
- Bread and pasta
- Cooked or processed food
- Citrus or acidic foods
- Oils and liquids such as soup
Growing Your Worm Population
How do you do this?
- Add food scraps regularly, ideally every 1 – 2 days
- Cut up the food you feed your worms. Make sure the pieces are smaller than a golf ball
- Start with small amounts and slowly increase the food you give them over the first 6 months.
- The population of worms will increase to match and will reach a point where they can eat through all the food waste you can give them very quickly
Harvest Time
Worm castings
- Worms feed at the top so harvest the casting from below
- It is ready when the contents look like a dark fine compost and few worms can be seen.
- Spread the castings around your garden beds.
- Castings may be liquefied into “Worm Tea” by adding 2 cups of worm castings to 20 litres of water. Add one tablespoon of molasses, bubble with high volume air pump for 36hrs.
Worm Juice
- Always let the liquid drain off freely into a separate bucket. If your worm farm has a tap, leave it open.
- It’s important to realize that this is leachate that has drained down through decomposing organic matter.
- The liquid oozing out of their worm bins is actually not that beneficial and can sometimes even harm plants. Leachate CAN be used as a liquid “fertilizer” of sorts, but the quality will be highly variable.
Click here to learn about the types of Worm Fertiliser
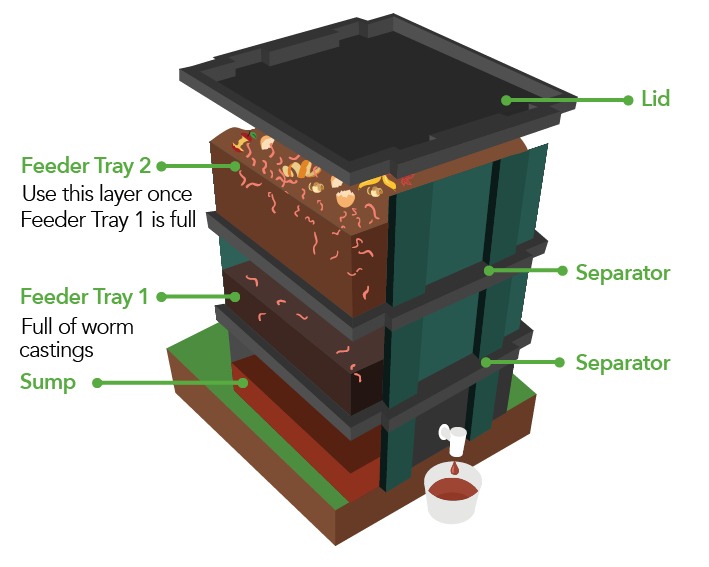
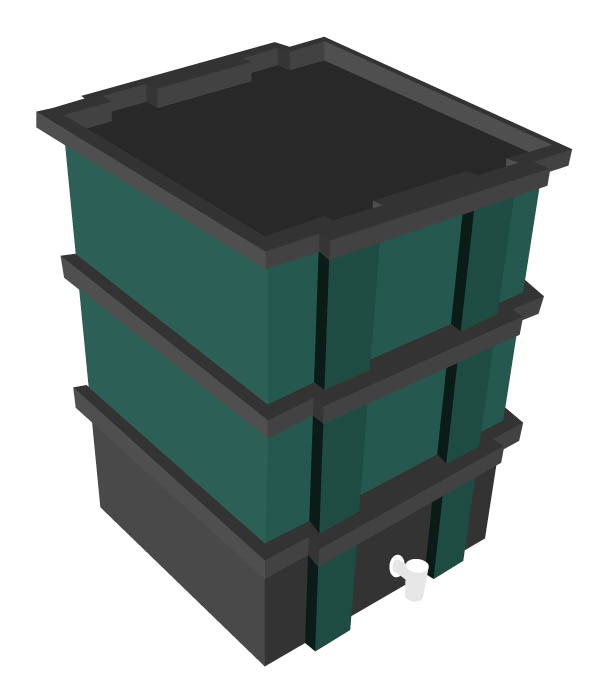
Types of Worm Farms
Stacked worm farms are divided into different layers.
They usually consist of
- A sump- this collects the liquids. Always leave the tap open with a bucket underneath to allow the worm farm to drain
- Frames- Usually two. These are stacked on each other as the worm farm fills up.
How to Use
- Place the sump on a stand, with a bucket underneath the tap to catch the liquids
- Keep the tap open to allow it to drain
- Place a frame on top of the sump.
- Fill this first frame with moist bedding and add your worms
- Feed a small amount of food to your worms
- Cover with wet carpet, paper or cardboard
- Over the next 6 months incrementally increase the food you feed your worms to build their population
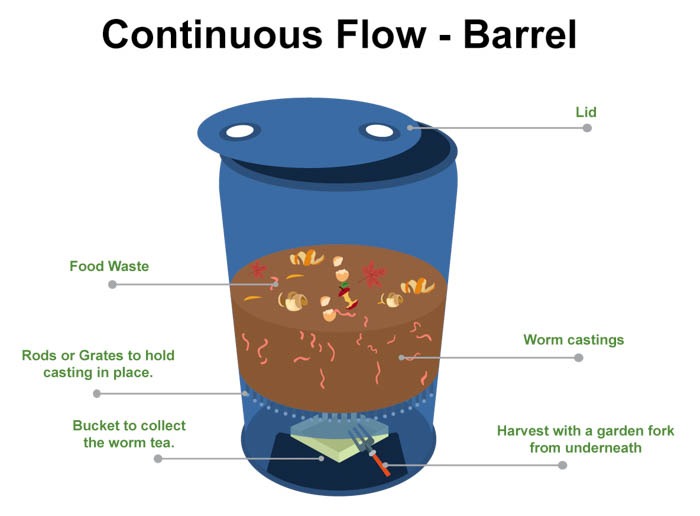
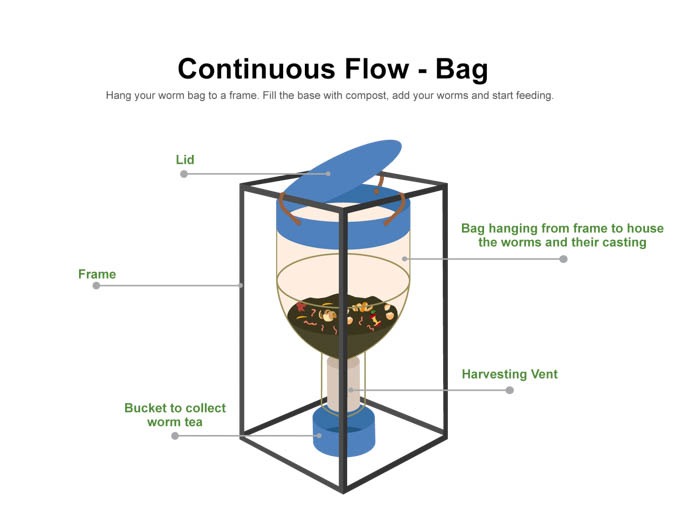
Continuous Flow Worm Farms
- Continuous flow worm farms are generally a single vessel with a large open cavity that houses the worms.
- It is secured at the base to hold the castings in place but still allows air to circulate and liquids to drain through.
- You simply feed on the surface and harvest from an opening at the base.
How to Use
- Fill the bottom quarter of the cavity with moist bedding and add your worms
- Feed a small amount of food to your worm
- Cover with wet carpet, paper or cardboard
- Over the next 6 months incrementally increase the food you feed your worms to build up their population
- Once the cavity is approximately two thirds full of worm castings you can start to harvest the compost through the opening at the base.
- The majority of worms will remain in the upper areas to feed on the available food,
- The castings will be quite compacted so should be free of worms
- Liquids will drain through naturally and can be caught in a bucket placed under the body of the worm farm
Courtesy compostcollective.org.nz